
How approval requests can burn away your ServiceNow capital. One of the bread-and-butter items of...
The ability to create approval requests for a digitized business processes in ServiceNow is one of the most important and powerful capabilities available on the platform. Putting checklists on these approval requests can make the platform even more powerful.
ServiceNow provides a convenient way to create User approvals and Group approvals.
Checklist Pro makes it easy to augment these approvals with the appearance of a Checklist on these approval records.
Let’s see how the combination of ServiceNow and Checklist Pro can be used to build a beautiful solution.
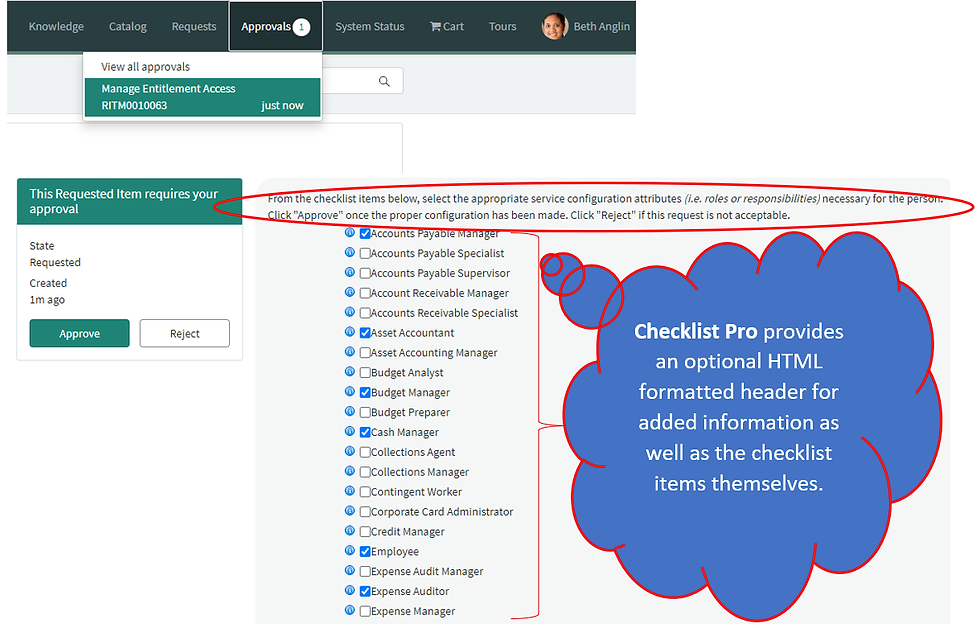
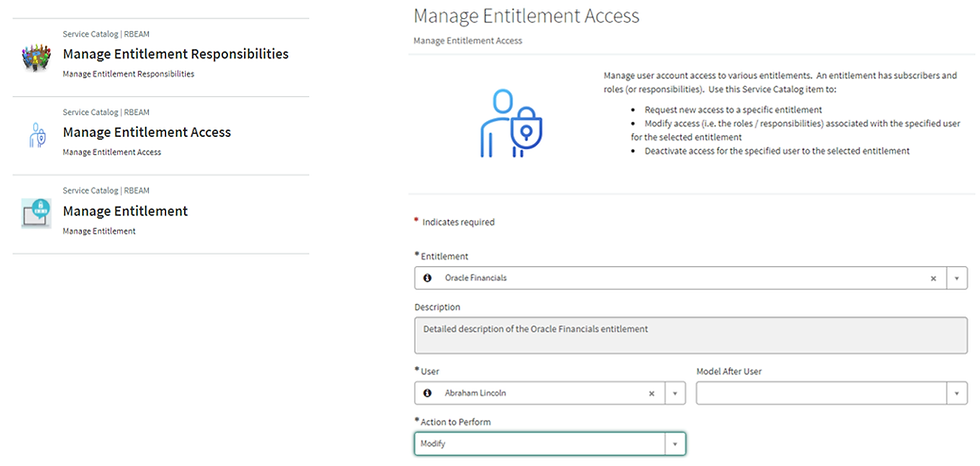
Suppose you want a governance process on who has what type of access to a particular system. A user needing more access to a Financial Management system like Oracle Financials wants to become an Expense Manager because of a new role in the organization.
With ServiceNow and Checklist Pro, this becomes easy to build and intuitive to use.
We created a Catalog Item (which also uses the Checklist) to pick a user and a system (both catalog item variables) and then the Checklist to model all the Oracle Financial roles & responsibilities available and those that the selected user has.
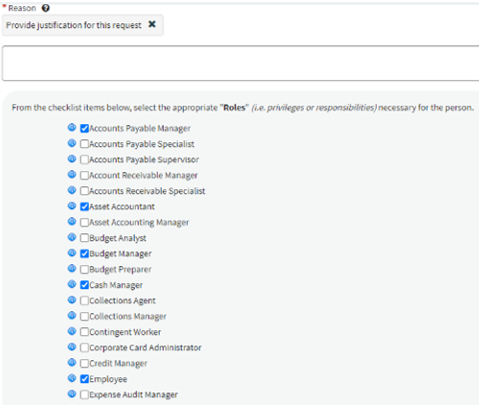
The user makes their adjustment to their list of Oracle Financial roles (controlled by the Checklist), provides a justification (reason) for the update, and submits the request.
In this example, the workflow sends this request to a review group responsible for determining if this request is acceptable or not and, because we have the roles and responsibilities represented as a checklist, they can modify the original request to ensure there are no conflicts of interests within the user’s selected responsibilities and then approve the request for continued processing.
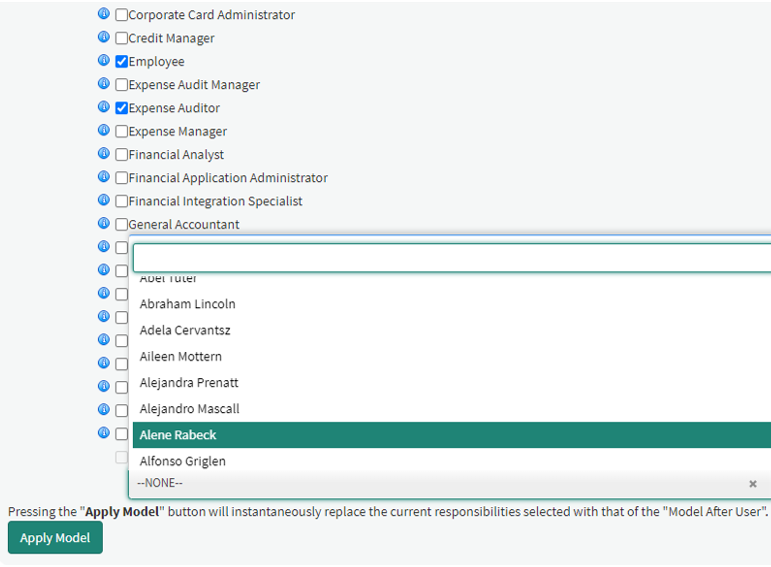
Checklist Pro also provides additional functionality by allowing a custom Checklist processing button to be configured. In this same example, we defined the functionality of the button to allow the review team to "model after" another user in the system. The review group simply picks another user in the system and by clicking the “Apply Model” button provided by Checklist Pro and with a little custom coding, we were able to.
In summary, this example illustrates the power of Checklist Pro and the flexibility it provides your development team (Pro-Coders and Citizen Developers alike) to build world class solutions on the ServiceNow platform!
Creating Checklist Pro Checklists
One of the capabilities that Checklist Pro provides is the ability to include HTML text as a header to the checklist. This can be extremely useful for providing information to the approver that could be used for several purposes such as:
-
Defining the criteria the reviewer should apply when determining if the request should be approved or rejected.
-
Include convenience links to knowledge base articles, reports, dashboards or other important records or information that the reviewer may need.
 Following the optional Checklist Pro HTML header is the actual checklist. Using Checklist Pro, you may pick from a variety of different checklist item types:
-
Checkboxes
-
Dates
-
HTML objects
-
Choice lists – having a set of user configurable choice options
-
Numbers
-
Reference fields
Checklist Configuration Steps (video here)
-
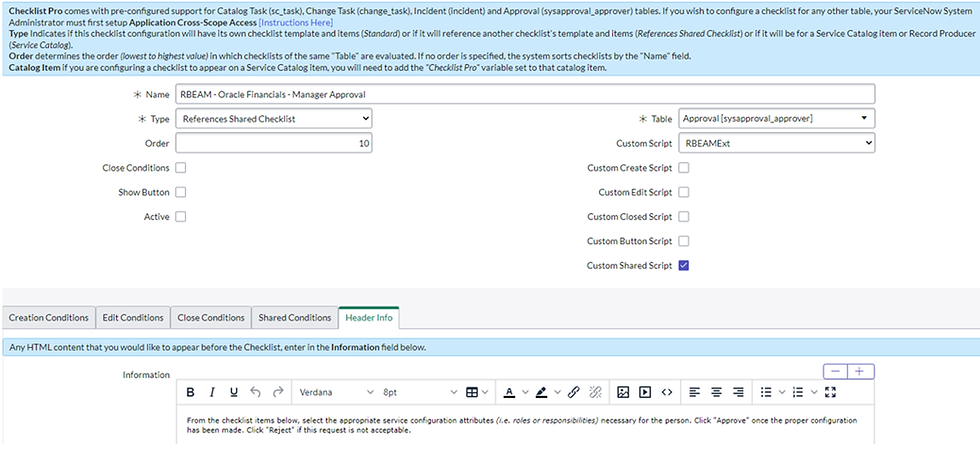
Create a Checklist Template Configuration (we created a video showing how to do this). This is just a top-level container for all the checklist item template records that will appear in your checklist.
-
Create a Checklist Configuration (see image above)
-
Define conditions for when the checklist should be created (“Create Conditions”).
-
Define conditions for when the checklist is editable (“Edit Conditions”).
-
[Optional] Define conditions for when the record hosting the checklist is considered “closed” (“Close Conditions”). This is needed for enforcement of “Required” checklist items and for any checklist item validations that need to be performed (Watch the Checklist Pro – Business Rule Setup video).
Prerequisite Steps
-
Before a checklist can appear on a record, it must first be added to the form view for that record. In the case of Approval Requests, since those may be accessed via the Service Portal, you should also add the “Checklist Pro” widget to the Approval Form Service Portal page (Watch the Checklist Pro – Form and Portal Setup video)